The Creative Process - Part Two

Part One of this blog described how a mug is formed from a ball of clay to an unfired mug shape. Read on to see how the creative process evolves.
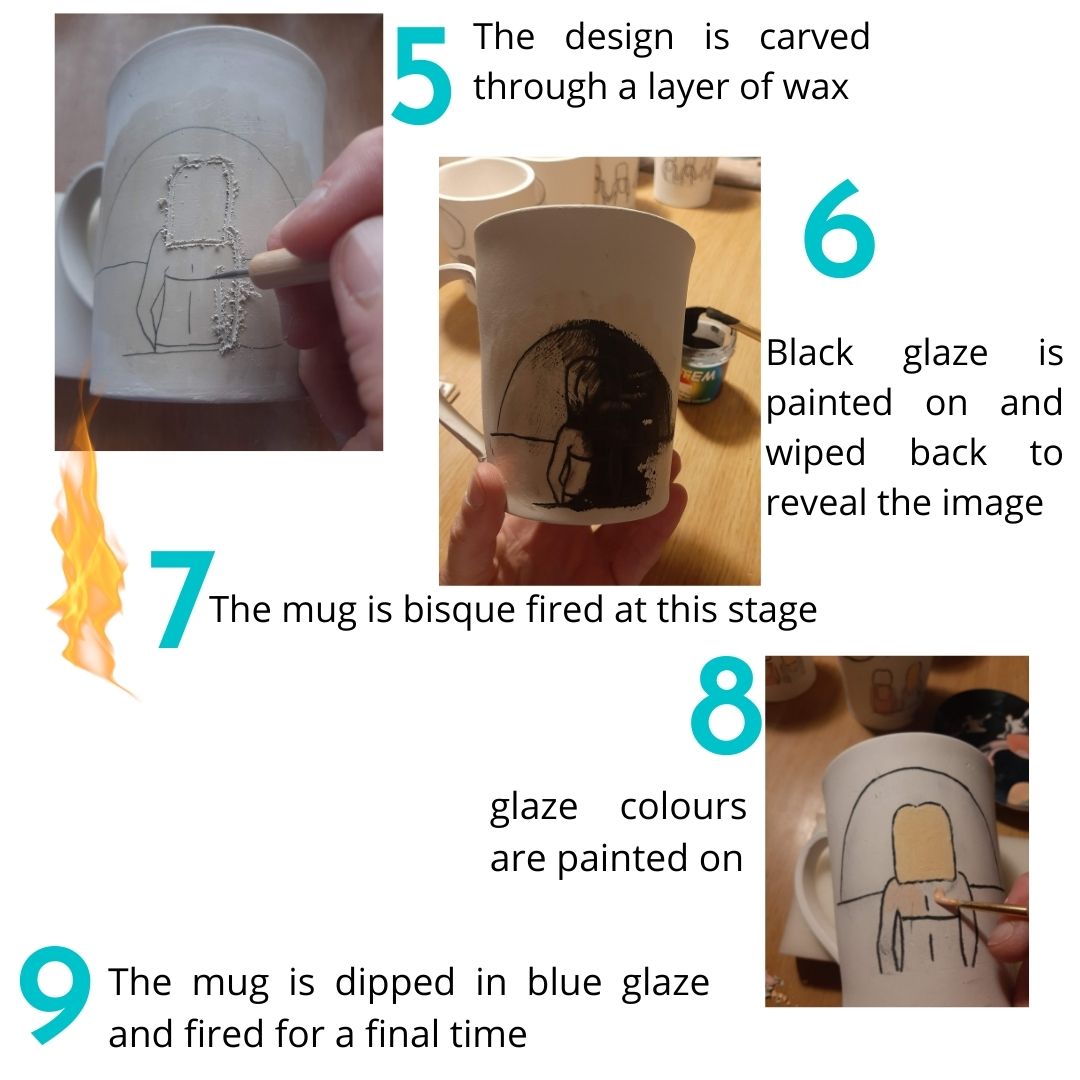
When the mug is leather hard – leather hard means that they are stiff enough to handle gently but still fragile enough to crush easily – I paint a layer of wax emulsion all over the mug and then carve the design into the mug. Each mug is individually hand carved, so no two designs are exactly alike. After carving, I paint a layer of black underglaze over the carving, and carefully wipe it back so that the outline of the design is left. This method of decoration is called Mishima, a Japanese process used in ceramics since the 16th century.
They mug is then left for another few days until it is completely dry, or bone dry. When I have enough mugs at the bone dry stage, can fill my kiln and start a bisque firing. A bisque firing can take up to ten hours to complete.
The next stage of the process is my favourite – colouring in! I use brush-on glazes to paint colours onto the engraved design. Three coats of each colour needs to be applied to ensure that lovely strong and vivid image of my mugs. It is a slow, painstaking process to get the images that I love onto each mug. This painted image then has a layer of wax emulsion painted over it to protect it from the next stage of glazing. After the design is painted and waxed over, each mug is dipped into a big tub of the chun blue or gloss white glaze.
And then it’s back into the kiln, for a glaze firing. I typically fire my stoneware mugs to a temperature of 1250 0C. It takes about 8 hours for the kiln to reach this temperature, and then it takes another 10 to 12 hours for the kiln to cool down enough to open. When the kiln is unloaded, the mugs are taken outside to have their rough bottoms sanded(yes, you did read that right!) to a nice smooth finish.
The mug is now ready for it’s first cuppa.


